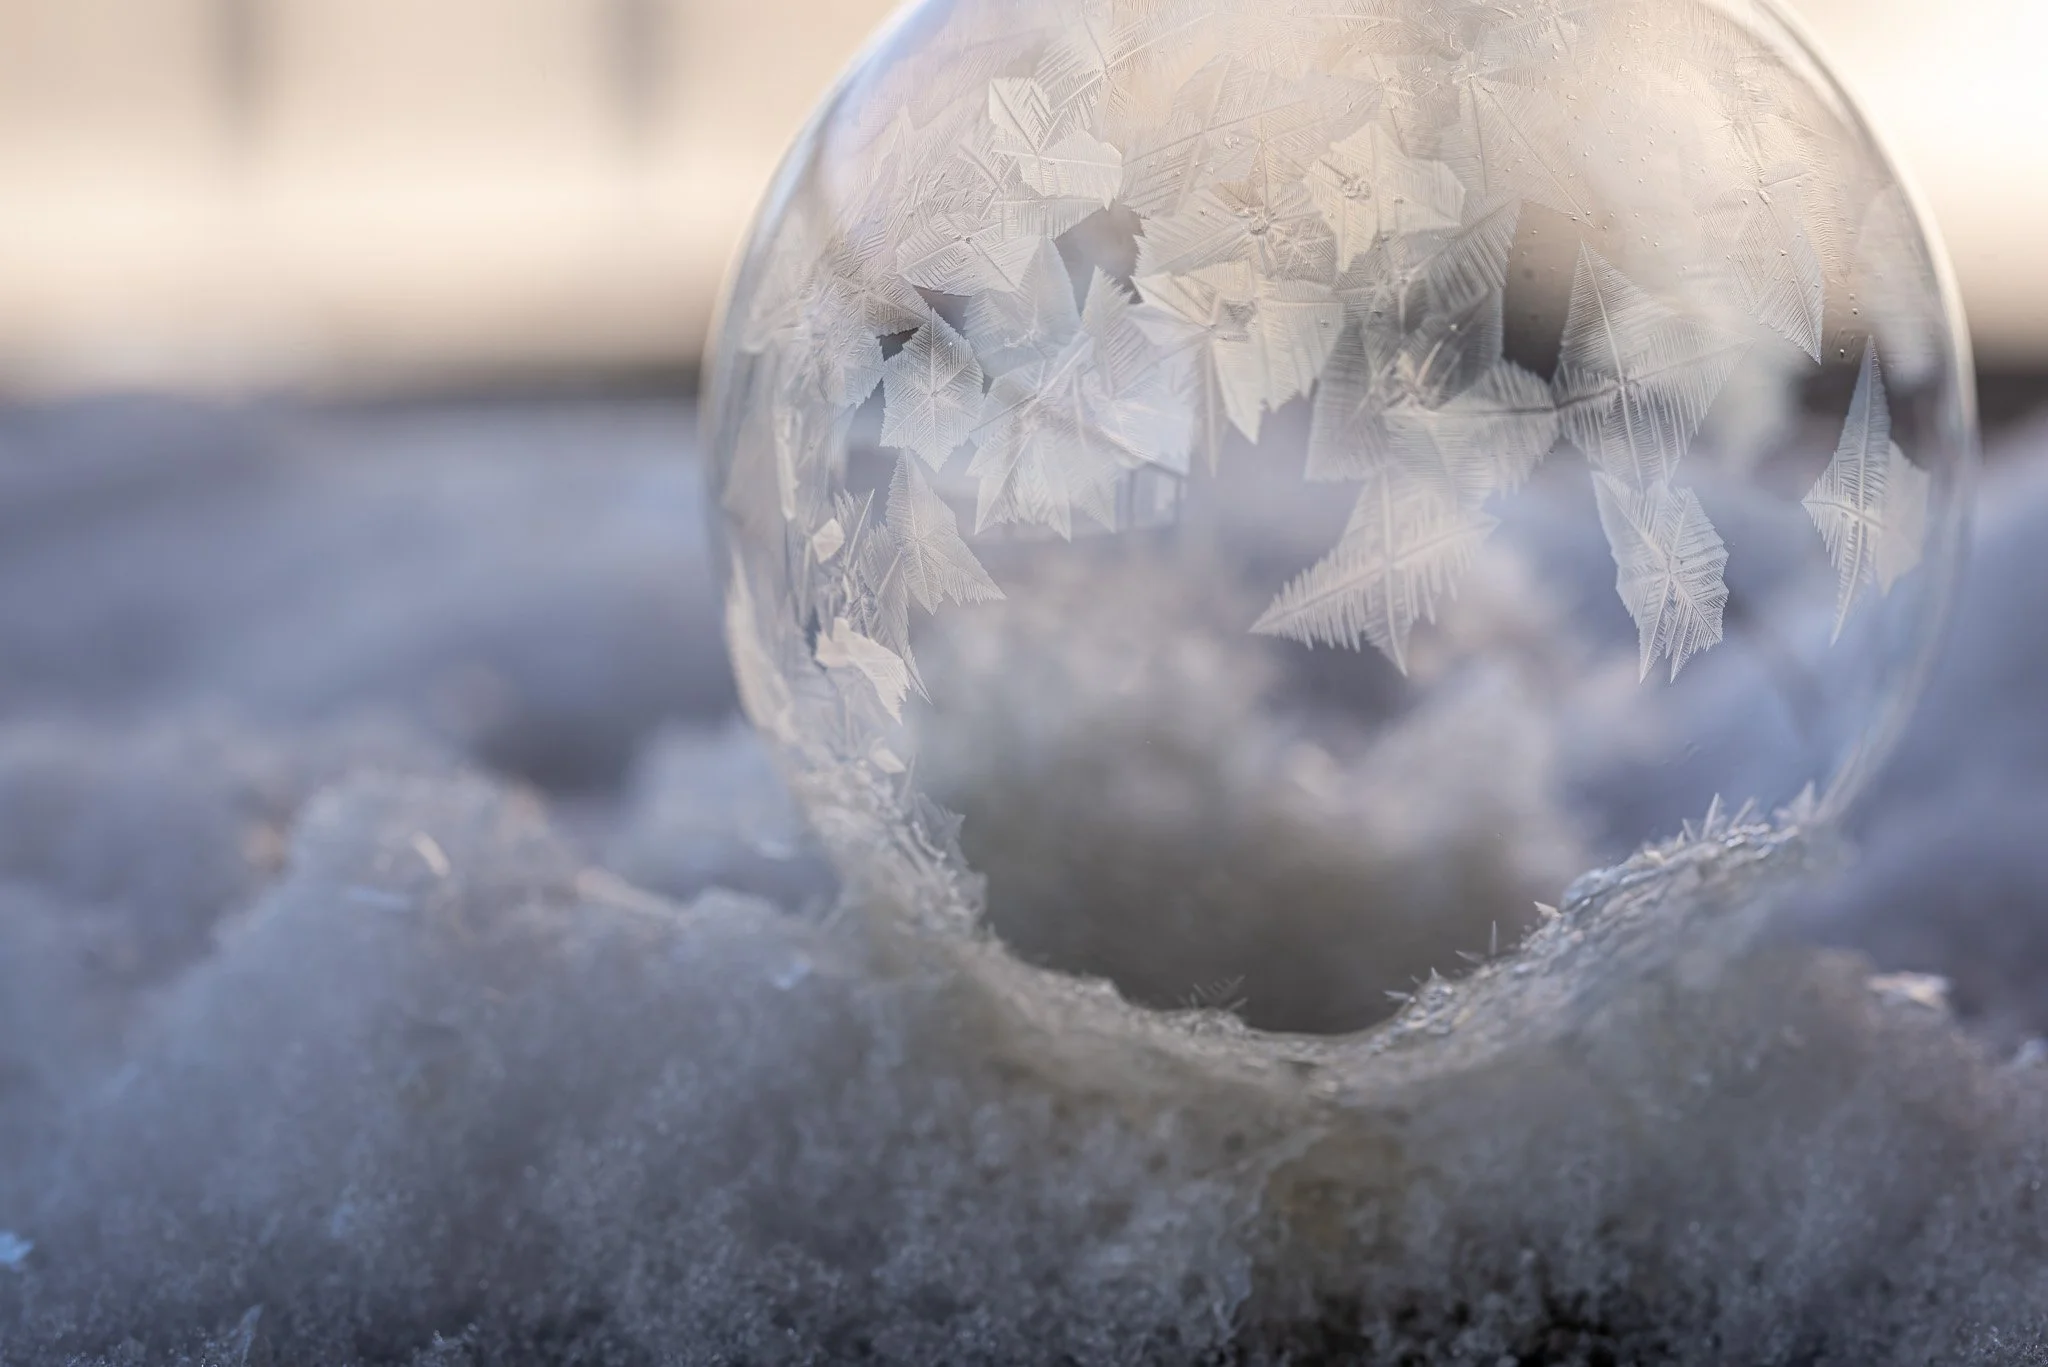
A fun winter activity and interesting photo subject are frozen soap bubbles. The most ideal temperature range for soap bubbles to form is between -10°C (14°F) and -20°C (-4°F), but it will still happen in even colder temperatures. It is best to not have any wind or a breeze, as that will cause the bubbles to burst before the ice crystals have fully formed. Here’s what you need to have to create frozen soap bubbles yourself.
Materials
Water
Corn syrup
Dish soap
Glass container
Straw
The formula I use to make my soap bubble solution is 6 parts water, 2 parts dish soap and 1 part white corn syrup. You could also use granulated sugar to enhance the crystallization. If you decide to, then you would use 1 part sugar in the above formula.
The corn syrup adds thickness to the solution, which will help keep the bubbles from popping too easily. Using this formula, you can prepare as much or as little solution as you need. I usually make a good quantity (250ml or 1 cup as my water portion) to make sure I don’t run out of solution midway through. I also use a mason jar as my glass container so that it’s easy to store any leftover solution to use at a later time.
The Process
The first thing to do is to combine the water and corn syrup together in your glass container and mix until the syrup has dissolved. It may take a bit of time for the syrup to dissolve, because of how thick it is. If you decide to use granulated sugar, add it to the water-syrup solution, and mix together until the sugar has dissolved. Once dissolved, add the dish soap and mix slowly, so that your stirring doesn’t create soap bubbles.
Once fully mixed, put the glass container with the solution into the freezer for around 30 minutes. Keep an eye on it as well, as you don’t want ice crystals to form while it’s in the freezer. Lowering the solution’s temperature will help make your soap bubbles freeze when blowing them. Once you take the solution out of the freezer, give it another slow stir.
Find a cold surface with texture on it, which will make your soap bubbles easier to stick to. Be creative and have fun with this, when you choose an interesting surface for your soap bubbles. It could be anything from freshly fallen snow, snow-covered bushes, whatever you think of that is interesting.
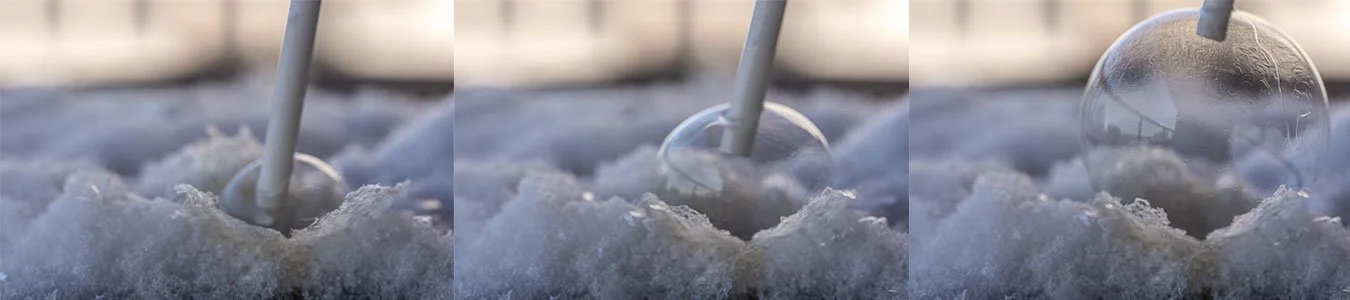
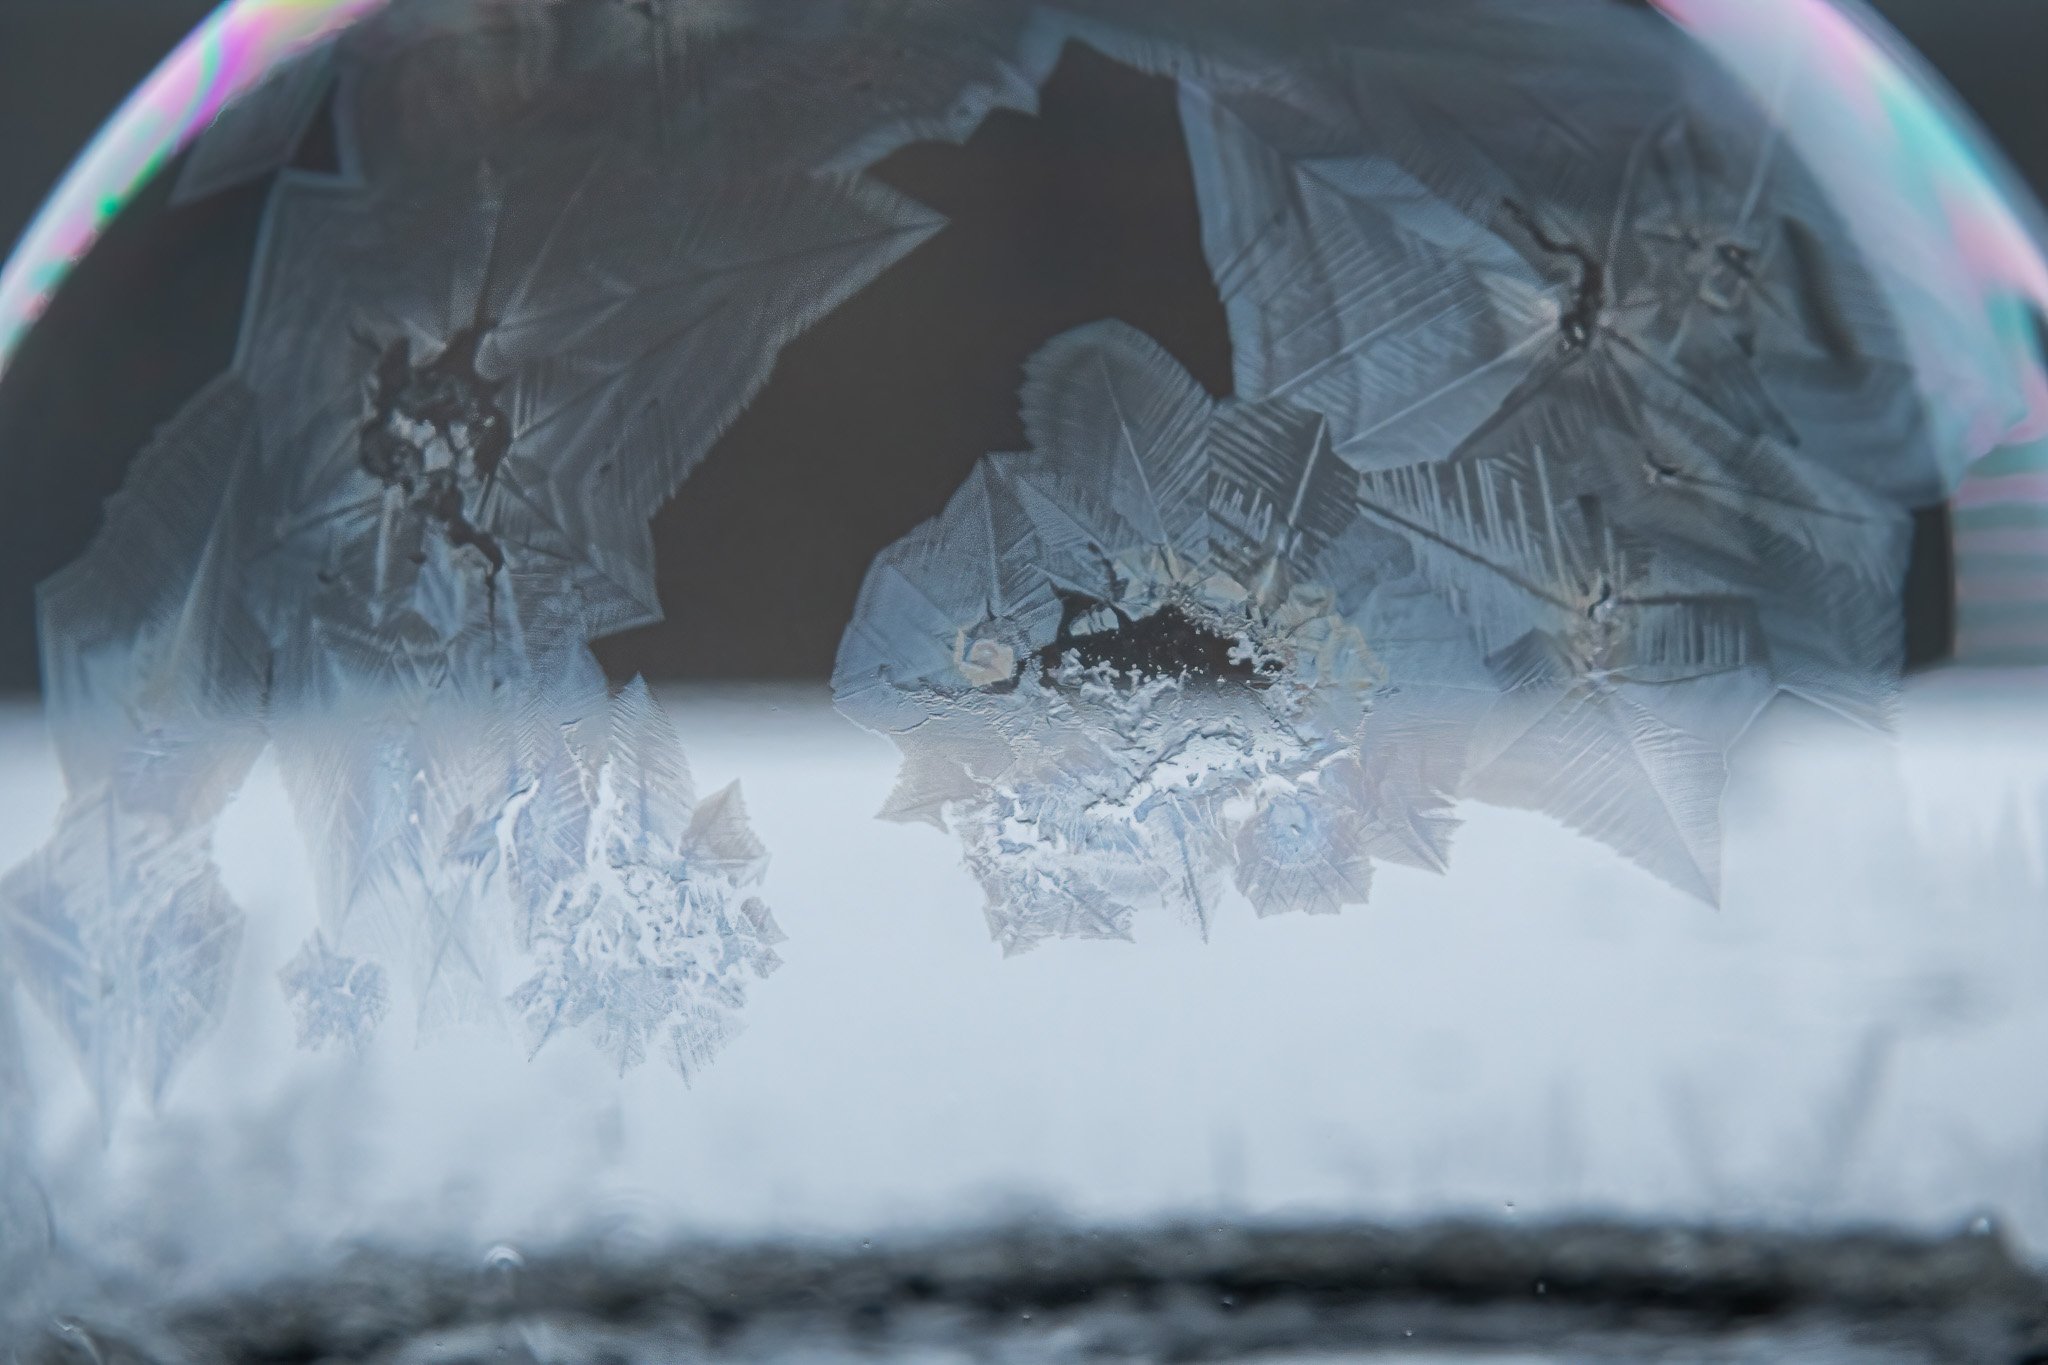
Use a straw to dip into the bubble solution, and blow your soap bubble onto your surface. Be patient, as it will take you a few times to blow a bubble without it popping which can happen if there’s a breeze, or if you blow through the straw too strongly, or even from contact with the surface. While inflating the bubble, slowly and carefully pull the straw out from the bubble so that it doesn’t pop from the straw. Once the soap bubble has formed, the freezing magic happens! Another thing to keep in mind is that the colder it is outside, the faster the ice crystals will form.
Photographing your bubbles
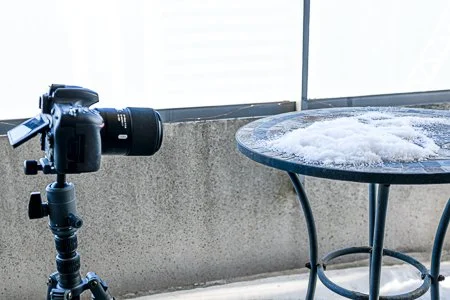
Nikon D750 with Tamron 90mm Macro lens on tripod.
When I photograph soap bubbles, I find it easier to form the bubbles in one spot on the surface I choose. That way, I can focus on a single composition until I’m satisfied with the photos that I have, before changing my set-up to another composition. I put my camera on a tripod which allows me to frame the bubbles consistently, and it frees my hands up to actually blow the soap bubbles. I use a zoom lens or macro lens so that I can fill the camera frame with the bubble, or get even closer to the ice crystals that form.
Since I create the bubbles in one spot, I can set my camera focus once and leave it until I’m done with that composition. I start setting my focus before blowing bubbles, by placing the straw on the surface and then focusing on the straw. Once I have the focus set toon the straw, I put the camera into manual focus mode so that the focus does not change.
I use live view to see my composition on the screen on the back of the camera, tilting the screen up, so that I don’t have to move too far to look into the camera. With the camera usually positioned low, it saves bending down to look in the viewfinder too. I prefer using a macro lens, to also keep the camera closer to me. Once the first soap bubble forms, I check the screen for focus and make any manual adjustments that may be needed. Since the depth of field is narrower the closer your subject is to the camera, it’ll impact how you decide to set your aperture. You may find that you’ll need to have the aperture closed down more than you’d think you’d need, to get enough depth of the bubble in focus.
I also set up my camera to take photos automatically. That allows me to focus on creating the soap bubbles without needing to go back and forth between the bubbles and the camera. A remote shutter release could work but when I use one, it feels like I’m fumbling around with both the remote release and the straw at the same time. To take the photos automatically, I set the intervalometer in my camera to one-second intervals, and I set the number of intervals to be quite high so that the camera doesn’t stop mid-ice crystal formation. If I still need to make any focus modifications, I can just pause the intervals to make my focus adjustments and then resume.
While these are techniques that I find useful, find a method that works best for you and have fun! Don’t forget to dress for the weather so that you don’t get cold, including gloves or glove liners for your hands.
Post-Processing Tips
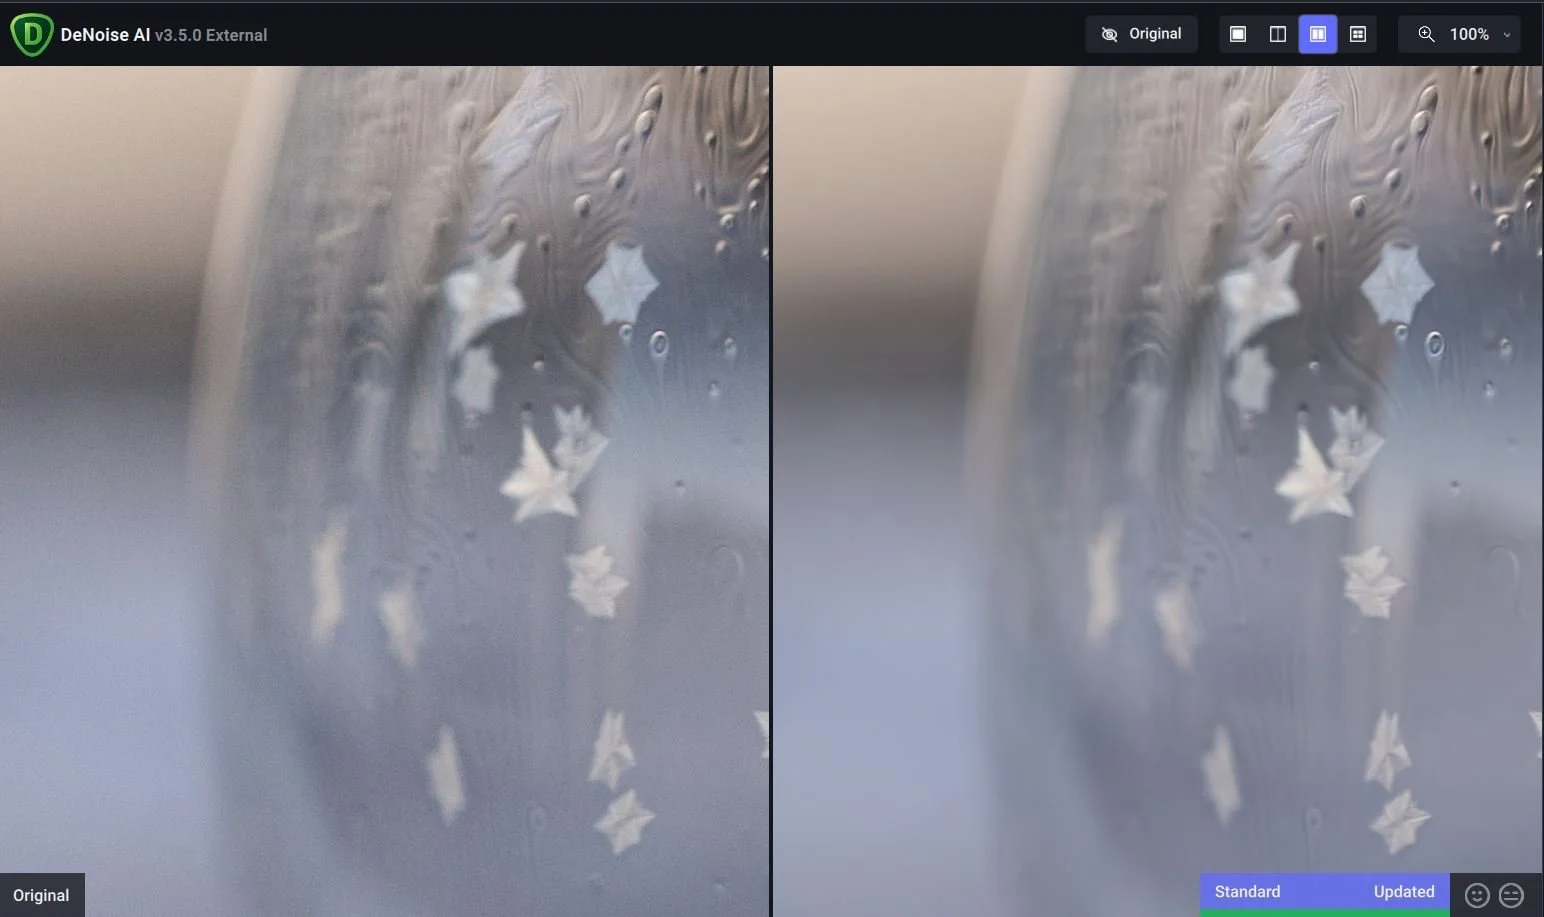
Even when using a tripod and photographing at a low ISO, noise can sometimes be inevitable. In this example, I had my camera settings at ISO 100, and there was still a bit of noise in the image. My go to software for noise reduction is Topaz Labs DeNoise AI, which did a great job in cleaning up the image. The sharpness that it added back in was sufficient for me, that I only added a bit of Texture in Adobe Lightroom to bring out the fine details of the ice crystals and surface bubbles on the soap bubble.